حرب البوير الثانية
| حرب البوير الثانية Second Anglo-Boer War | |||||||||
|---|---|---|---|---|---|---|---|---|---|
| جزء من حروب البوير | |||||||||
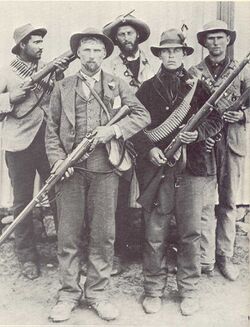
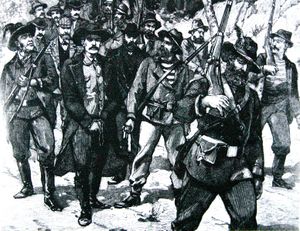
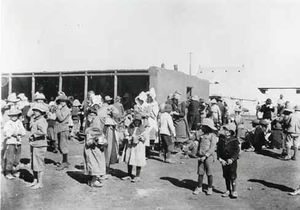
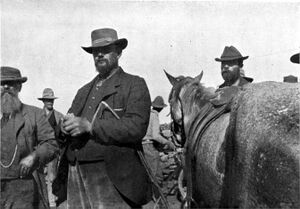
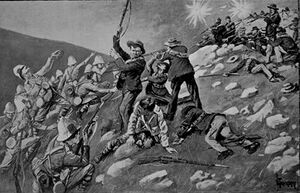
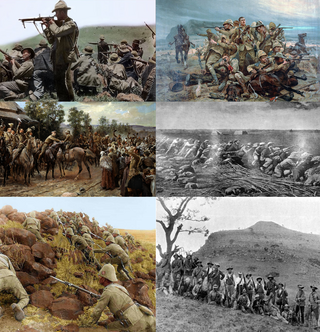 Clockwise from left: Boers in action at the Battle of Colenso, the 17th Lancers holding off an attack at Elands River, General Redvers Buller entering Ladysmith on 27 Feb 1900, Boers at the besieged city of Mafeking, Canadian troops during the Battle of Paardeberg, and Boer militia at the Battle of Spion Kop. | |||||||||
| |||||||||
| المتحاربون | |||||||||
|
قائمة
|
| ||||||||
| القادة والزعماء | |||||||||
|
|
| ||||||||
| القوى | |||||||||
|
British: 347,000 Colonial: 103,000 – 153,000 African auxiliaries: 100,000[4] Total: 550,000 – 600,000 |
Boer commandos: | ||||||||
| الضحايا والخسائر | |||||||||
|
26,092 dead[ب] 75,430 returned home sick or wounded[8] 22,828 wounded 934 missing الإجمالي: ~125,284 |
6,189 dead[ت] 24,000 captured (sent overseas)[6][8] الإجمالي: ~30,189 | ||||||||
|
Civilian casualties: 46,370 fatalities 26,370 Boer women and children died in concentration camps 20,000+ Africans of the 115,000 interned in separate concentration camps.[9] | |||||||||
حرب البوير الثانية حرب استمرت من 11 أكتوبر 1899 إلى 31 مايو 1902 بين الإمبراطورية البريطانية وجمهوريتي بوير مستقلتين (the South African Republic and the Orange Free State) على نفوذ الإمبراطورية في أفريقيا الجنوبية من 1899 حتى 1902.
The Witwatersrand Gold Rush caused a large influx of "foreigners" to the South African Republic, mostly British from the Cape Colony. They were not permitted to have a vote, and were regarded as "unwelcome visitors", invaders, and they protested to the British authorities in the Cape. Negotiations failed and, in the opening stages of the war, the Boers launched successful attacks against British outposts before being pushed back by imperial reinforcements. Though the British swiftly occupied the Boer republics, numerous Boers refused to accept defeat and engaged in guerrilla warfare. Eventually, British forces used scorched-earth policies, and the terrible conditions suffered in concentration camps by Boer civilians (mostly women and children) who had been displaced by these policies, brought the remaining Boer guerrillas to the negotiating table, ending the war.[10][11]
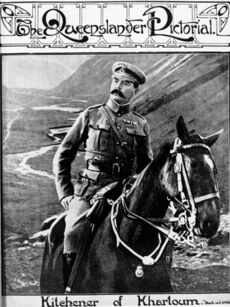
The conflict broke out in 1899, after the failure of the Bloemfontein Conference when Boer irregulars and militia attacked colonial settlements in nearby British colonies. Starting in October 1899, the Boers placed Ladysmith, Kimberley, and Mafeking under siege, and won a string of victories at Colenso, Magersfontein and Stormberg. In response to these developments, increased numbers of British Army soldiers were brought to Southern Africa, and mounted largely unsuccessful attacks against the Boers. However, British military fortunes changed when their commanding officer, General Redvers Buller was replaced by Lord Roberts and Lord Kitchener, who relieved the three besieged cities and invaded the two Boer Republics in early 1900 at the head of a 180,000-strong expeditionary force. The Boers, aware they were unable to resist such a large force, chose to refrain from fighting pitched battles, allowing the British to occupy both republics and their capitals, Pretoria and Bloemfontein.[12][13][14]
Boer politicians, including President of the South African Republic Paul Kruger either fled the region or went into hiding; the British Empire officially annexed the two republics in 1900. In Britain, the Conservative ministry led by Lord Salisbury attempted to capitalise on British military successes by calling an early general election, which was dubbed by contemporary observers a "khaki election". However, numerous Boer fighters took to the hills and launched a guerrilla campaign against the British occupational forces, becoming known as bittereinders. Led by prominent generals such as Louis Botha, Jan Smuts, Christiaan de Wet, and Koos de la Rey, Boer guerrillas launched a campaign of hit-and-run attacks and ambushes against the British, which continued for two years.[15][16]
The Boer guerrilla campaign proved difficult for the British to defeat, due in part to British unfamiliarity with guerrilla tactics and extensive support for the guerrillas among the civilian population in the Boer Republics. In response to continued failures to defeat the Boer guerillas, British high command ordered several scorched earth policies to be implemented as part of a large scale and multi-pronged counterinsurgency campaign; a complex network of nets, blockhouses, strongpoints and barbed wire fences was constructed, virtually partitioning the occupied republics. British troops committed war crimes and were ordered to destroy farms and slaughter livestock to deny them to Boer guerillas. Over a hundred thousand Boer civilians (mostly women and children) were forcibly relocated into concentration camps, where 26,000 died of various causes, mostly starvation and disease. Black Africans in the same areas were also interned in concentration camps as well to prevent them from supplying the Boers; 20,000 died in the camps as well, largely due to the same causes as their Boer counterparts.[17]
In addition to these scorched earth policies, British mounted infantry units were deployed to track down and engage individual Boer guerilla units; by this stage of the war, all battles being fought were small-scale skirmishes. Few combatants on either side were killed in action, with most casualties dying from disease. Lord Kitchener began to offer generous terms of surrender to remaining Boer leaders in an effort to bring an end to the conflict. Eager to ensure their fellow Boers were released from the concentration camps, the majority of Boer commanders accepted the British terms in the Treaty of Vereeniging, formally surrendering in May 1902. The former republics were transformed into the British colonies of the Transvaal and Orange River, and in 1910 were merged with the Natal and Cape Colonies to form the Union of South Africa, a self-governing dominion within the British Empire.[18]
British expeditionary efforts were aided significantly by colonial forces from the Cape Colony, the Natal, Rhodesia,[19] as well as large numbers of volunteers from the British Empire worldwide, particularly Australia, Canada, India and New Zealand. Later in the war, Black African recruits contributed increasingly to the British war effort. International public opinion was generally sympathetic to the Boers and hostile to the British. Even within the United Kingdom, there existed significant opposition to the war. As a result, the Boer cause attracted thousands of volunteers from neutral countries all over the world, including the German Empire, United States, Russia and even some parts of the British Empire such as Australia and Ireland.[20] Many consider the Boer War as marking the beginning of the questioning of the British Empire's veneer of impenetrable global dominance; this is due to the war's surprisingly long duration and the unforeseen, discouraging losses suffered by the British fighting the "cobbled-together army" of Boers.[21]
خلفية تاريخية
من المعروف ان البوير هم جنوب أفارقة من أصل هولندي. وقد استولت إنجلترا على المستعمرة الهولندية عام 1806 أثناء الحروب النابليونية. إلا ان هذا الاستعمار البريطاني قوبل بالمقاومة من البوير الذين رفضوا تحويلهم إلى الطائفة الإنجيلية والسياسات البريطانية التي تمنع العبودية. ففي عام 1833، بدأ البويريون الهجرة الجماعية إلى الأراضي الأفريقية حيث انشأوا جمهورية ترانسفال و جمهورية أورانج الحرة.
خلفية
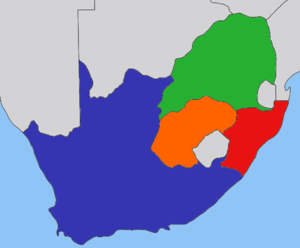
عاش شعب الجمهوريتين في سلام مع جيرانهم من البريطانيين حتى عام 1867. لكن بمجرد اكتشاف الماس والذهب في هذه الأراضي بدأ الصراع بين الجمهوريات البويرية والإنجليز.
غارة جيمسون
التصعيد والحرب
الطور الأول: هجوم البوير (اكتوبر – ديسمبر 1899)
وصل القتال إلى أشده بين الجهتين عام 1899. وبحلول عام 1900، نجحت القوات البريطانية في السيطرة على معظم المدن البويرية. تمثلت خطورة البوير في شنهم لبعض الهجمات المسلحة. لكن الإنجليز بفضل خططهم المدروسة قضوا على معظم وحدات البوير المسلحة. في الوقت ذاته اعتقلت أسر الجنود البوير في معسكرات اعتقال.
أولى محاولات الانقاذ البريطانية
المرحلة الثانية: الهجوم البريطاني من يناير إلى سبتمبر 1900
Arthur Conan Doyle, The Great Boer War, 1900
The British government took these defeats badly and with the sieges still continuing was compelled to send two more divisions plus large numbers of colonial volunteers. By January 1900 this would become the largest force Britain had ever sent overseas, amounting to some 180,000 men with further reinforcements being sought.[14]
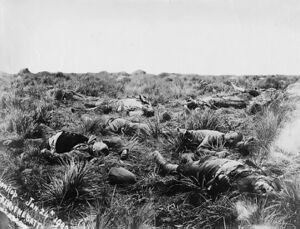
While watching for these reinforcements, Buller made another bid to relieve Ladysmith by crossing the Tugela west of Colenso. Buller's subordinate, Major General Charles Warren, successfully crossed the river, but was then faced with a fresh defensive position centred on a prominent hill known as Spion Kop. In the resulting Battle of Spion Kop, British troops captured the summit by surprise during the early hours of 24 January 1900, but as the early morning fog lifted they realised too late that they were overlooked by Boer gun emplacements on the surrounding hills. The rest of the day resulted in a disaster caused by poor communication between Buller and his commanders. Between them they issued contradictory orders, on the one hand ordering men off the hill, while other officers ordered fresh reinforcements to defend it. The result was 350 men killed and nearly 1,000 wounded and a retreat across the Tugela River into British territory. There were nearly 300 Boer casualties.
Buller attacked Louis Botha again on 5 February at Vaal Krantz and was again defeated. Buller withdrew early when it appeared that the British would be isolated in an exposed bridgehead across the Tugela, for which he was nicknamed "Sir Reverse" by some of his officers.
بولر يُستبدَل
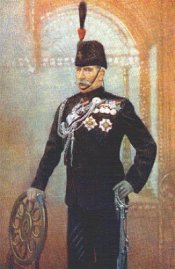
By taking command in person in Natal, Buller had allowed the overall direction of the war to drift. Because of concerns about his performance and negative reports from the field, he was replaced as Commander in Chief by Field Marshal Lord Roberts. Roberts quickly assembled an entirely new team for headquarters staff and he chose military men from far and wide: Lord Kitchener (Chief of Staff) from the Sudan; Frederick Russell Burnham (Chief of Scouts), the American scout, from the Klondike; George Henderson from the Staff College; Neville Bowles Chamberlain from Afghanistan; and William Nicholson (Military Secretary) from Calcutta.[بحاجة لمصدر] Like Buller, Roberts first intended to attack directly along the Cape Town–Pretoria railway but, again like Buller, was forced to relieve the beleaguered garrisons. Leaving Buller in command in Natal, Roberts massed his main force near the Orange River and along the Western Railway behind Methuen's force at the Modder River, and prepared to make a wide outflanking move to relieve Kimberley.
Except in Natal, the war had stagnated. Other than a single attempt to storm Ladysmith, the Boers made no attempt to capture the besieged towns. In the Cape Midlands, the Boers did not exploit the British defeat at Stormberg, and were prevented from capturing the railway junction at Colesberg. In the dry summer, the grazing on the veld became parched, weakening the Boers' horses and draught oxen, and many Boer families joined their menfolk in the siege lines and laagers (encampments), fatally encumbering Cronjé's army.
روبرتس ينجد المحاصَرين
Roberts launched his main attack on 10 February 1900 and although hampered by a long supply route, managed to outflank the Boers defending Magersfontein. On 14 February, a cavalry division under Major General John French launched a major attack to relieve Kimberley. Although encountering severe fire, a massed cavalry charge split the Boer defences on 15 February, opening the way for French to enter Kimberley that evening, ending its 124 days' siege.
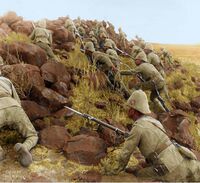
Meanwhile, Roberts pursued Piet Cronjé's 7,000-strong force, which had abandoned Magersfontein to head for Bloemfontein. General French's cavalry was ordered to assist in the pursuit by embarking on an epic 50 km (31 mi) drive towards Paardeberg where Cronjé was attempting to cross the Modder River. At the Battle of Paardeberg from 18 to 27 February, Roberts then surrounded General Piet Cronjé's retreating Boer army. On 17 February, a pincer movement involving both French's cavalry and the main British force attempted to take the entrenched position, but the frontal attacks were uncoordinated and so were repulsed by the Boers. Finally, Roberts resorted to bombarding Cronjé into submission. It took ten days, and when the British troops used the polluted Modder River as water supply, typhoid killed many troops. General Cronjé was forced to surrender at Surrender Hill with 4,000 men.
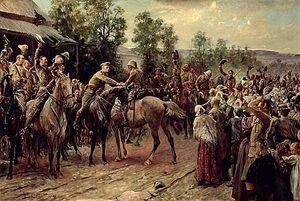
In Natal, the Battle of the Tugela Heights, which started on 14 February was Buller's fourth attempt to relieve Ladysmith. The losses Buller's troops had sustained convinced Buller to adopt Boer tactics "in the firing line—to advance in small rushes, covered by rifle fire from behind; to use the tactical support of artillery; and above all, to use the ground, making rock and earth work for them as it did for the enemy." Despite reinforcements his progress was painfully slow against stiff opposition. However, on 26 February, after much deliberation, Buller used all his forces in one all-out attack for the first time and at last succeeded in forcing a crossing of the Tugela to defeat Botha's outnumbered forces north of Colenso. After a siege lasting 118 days, the Relief of Ladysmith was effected, the day after Cronjé surrendered, but at a total cost of 7,000 British casualties. Buller's troops marched into Ladysmith on 28 February.[22]
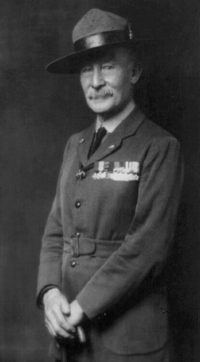
After a succession of defeats, the Boers realised that against such overwhelming numbers of troops, they had little chance of defeating the British and so became demoralised. Roberts then advanced into the Orange Free State from the west, putting the Boers to flight at the Battle of Poplar Grove and capturing Bloemfontein, the capital, unopposed on 13 March with the Boer defenders escaping and scattering. Meanwhile, he detached a small force to relieve Baden-Powell. The Relief of Mafeking on 18 May 1900 provoked riotous celebrations in Britain, the origin of the Edwardian slang word "mafficking". On 28 May, the Orange Free State was annexed and renamed the Orange River Colony.
الاستيلاء على پريتوريا
After being forced to delay for several weeks at Bloemfontein by a shortage of supplies, an outbreak of typhoid at Paardeberg, and poor medical care, Roberts finally resumed his advance.[23] He was forced to halt again at Kroonstad for 10 days, due once again to the collapse of his medical and supply systems, but finally captured Johannesburg on 31 May and the capital of the Transvaal, Pretoria, on 5 June. The first into Pretoria was Lt. William Watson of the New South Wales Mounted Rifles, who persuaded the Boers to surrender the capital.[24] Before the war, the Boers had constructed several forts south of Pretoria, but the artillery had been removed from the forts for use in the field, and in the event they abandoned Pretoria without a fight. Having won the principal cities, Roberts declared the war over on 3 September 1900; and the South African Republic was formally annexed.
British observers believed the war to be all but over after the capture of the two capital cities. However, the Boers had earlier met at the temporary new capital of the Orange Free State, Kroonstad, and planned a guerrilla campaign to hit the British supply and communication lines. The first engagement of this new form of warfare was at Sanna's Post on 31 March where 1,500 Boers under the command of Christiaan de Wet attacked Bloemfontein's waterworks about 37 كيلومتر (23 mi) east of the city, and ambushed a heavily escorted convoy, which caused 155 British casualties and the capture of seven guns, 117 wagons, and 428 British troops.[25]
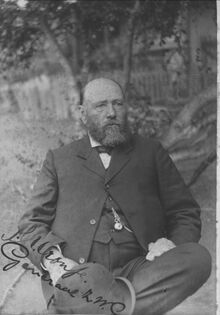
After the fall of Pretoria, one of the last formal battles was at Diamond Hill on 11–12 June, where Roberts attempted to drive the remnants of the Boer field army under Botha beyond striking distance of Pretoria. Although Roberts drove the Boers from the hill, Botha did not regard it as a defeat, for he inflicted 162 casualties on the British while suffering only around 50 casualties.
تراجع البوير
The set-piece period of the war now largely gave way to a mobile guerrilla war, but one final operation remained. President Kruger and what remained of the Transvaal government had retreated to eastern Transvaal. Roberts, joined by troops from Natal under Buller, advanced against them, and broke their last defensive position at Bergendal on 26 August. As Roberts and Buller followed up along the railway line to Komatipoort, Kruger sought asylum in Portuguese East Africa (modern Mozambique). Some dispirited Boers did likewise, and the British gathered up much war material. However, the core of the Boer fighters under Botha easily broke back through the Drakensberg Mountains into the Transvaal highveld after riding north through the bushveld.
As Roberts's army occupied Pretoria, the Boer fighters in the Orange Free State retreated into the Brandwater Basin, a fertile area in the south-east of the Republic. This offered only temporary sanctuary, as the mountain passes leading to it could be occupied by the British, trapping the Boers. A force under General Archibald Hunter set out from Bloemfontein to achieve this in July 1900. The hard core of the Free State Boers under De Wet, accompanied by President Steyn, left the basin early. Those remaining fell into confusion and most failed to break out before Hunter trapped them. 4,500 Boers surrendered and much equipment was captured but as with Roberts's drive against Kruger at the same time, these losses were of relatively little consequence, as the hard core of the Boer armies and their most determined and active leaders remained at large.
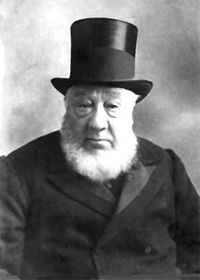
From the Basin, Christiaan de Wet headed west. Although hounded by British columns, he succeeded in crossing the Vaal into western Transvaal, to allow Steyn to travel to meet their leaders. There was much sympathy for the Boers on mainland Europe. In October, President Kruger and members of the Transvaal government left Portuguese East Africa on the Dutch warship De Gelderland, sent by the Queen Wilhelmina of the Netherlands. Paul Kruger's wife, however, was too ill to travel and remained in South Africa where she died on 20 July 1901 without seeing her husband again. President Kruger first went to Marseille and then on to the Netherlands, where he stayed for a while before moving finally to Clarens, Switzerland, where he died in exile on 14 July 1904.
الأسرى يُرسلون وراء البحار
The first sizeable batch of Boer prisoners of war taken by the British consisted of those captured at the Battle of Elandslaagte on 21 October 1899. At first, many were put on ships, but as numbers grew, the British decided they did not want them kept locally. The capture of 400 POWs in February 1900 was a key event, which made the British realise they could not accommodate all POWs in South Africa.[26] The British feared they could be freed by sympathetic locals. Moreover, they already had trouble supplying their own troops in South Africa, and did not want the added burden of sending supplies for the POWs. Britain therefore chose to send many POWs overseas.
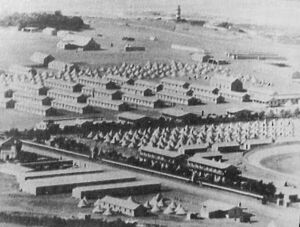
The first overseas (off African mainland) camps were opened in Saint Helena, which ultimately received about 5,000 POWs.[27] About 5,000 POWs were sent to Ceylon.[28] Other POWs were sent to Bermuda and India.[26]
In all, nearly 26,000 POWs were sent overseas.[29]
قَسَم الحياد
On 15 March 1900, Lord Roberts proclaimed an amnesty for all burghers, except leaders, who took an oath of neutrality and returned quietly to their homes.[30] It is estimated that between 12,000 and 14,000 burghers took this oath between March and June 1900.[31]
الجراحة والطب أثناء الحرب
معسكرات الاعتقال (1900 - 1902)
مفوضية فوسـِت[32]
سياسة كتشنر وجدال ما بعد الحرب
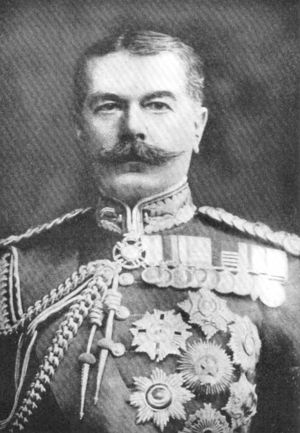
المرحلة الثالثة: حرب العصابات (سبتمبر 1900 – مايو 1902)
By September 1900, the British were nominally in control of both Republics, with the exception of the northern part of the Transvaal. However, they soon discovered that they only controlled the territory their columns physically occupied. Despite the loss of their two capital cities and half of their army, the Boer commanders adopted guerrilla warfare tactics, primarily conducting raids against railways, resource and supply targets, all aimed at disrupting the operational capacity of the British Army. They avoided pitched battles and casualties were light.
Each Boer commando unit was sent to the district from which its members had been recruited, which meant that they could rely on local support and personal knowledge of the terrain and the towns within the district thereby enabling them to live off the land. Their orders were simply to act against the British whenever possible. Their tactics were to strike fast and hard causing as much damage to the enemy as possible, and then to withdraw and vanish before enemy reinforcements could arrive. The vast distances of the republics allowed the Boer commandos considerable freedom to move about and made it nearly impossible for the 250,000 British troops to control the territory effectively using columns alone. As soon as a British column left a town or district, British control of that area faded away.
The Boer commandos were especially effective during the initial guerrilla phase of the war because Roberts had assumed that the war would end with the capture of the Boer capitals and the dispersal of the main Boer armies. Many British troops were therefore redeployed out of the area, and had been replaced by lower-quality contingents of Imperial Yeomanry and locally raised irregular corps.
From late May 1900, the first successes of the Boer guerrilla strategy were at Lindley (where 500 Yeomanry surrendered), and at Heilbron (where a large convoy and its escort were captured) and other skirmishes resulting in 1,500 British casualties in less than ten days. In December 1900, De la Rey and Christiaan Beyers attacked and mauled a British brigade at Nooitgedacht. As a result of these and other Boer successes, the British, led by Lord Kitchener, mounted three extensive searches for Christiaan de Wet, but without success. However, the Boer raids on British army camps and other targets were sporadic and poorly planned, and the very nature of the Boer guerrilla war itself had practically no overall long-term objective, with the exception to simply harass the British. This led to a disorganised pattern of scattered engagements between the British and the Boers throughout the region.
Use of blockhouses
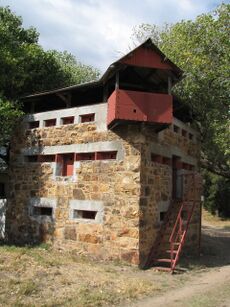
The British were forced to quickly revise their tactics. They concentrated on restricting the freedom of movement of the Boer commandos and depriving them of local support. The railway lines had provided vital lines of communication and supply, and as the British had advanced across South Africa, they had used armoured trains and had established fortified blockhouses at key points.[33] They now built additional blockhouses (each housing between six and eight soldiers) and fortified these to protect supply routes against Boer raiders. Eventually some 8,000 such blockhouses were built across the two South African republics, radiating from the larger towns along principal routes. Each blockhouse cost between £800 and £1,000 and took about three months to build. Despite the expense, they proved very effective; not one bridge at which a blockhouse was sited and manned was blown up.[33]
The blockhouse system required an enormous number of troops to garrison. Well over 50,000 British troops, or 50 battalions, were involved in blockhouse duty, greater than the approximately 30,000 Boers in the field during the guerrilla phase. In addition, up to 16,000 Africans were used both as armed guards and to patrol the line at night.[33] The Army linked the blockhouses with barbed wire fences to parcel up the wide veld into smaller areas. "New Model" drives were mounted under which a continuous line of troops could sweep an area of veld bounded by blockhouse lines, unlike the earlier inefficient scouring of the countryside by scattered columns.
حملة الأرض المحروقة ضد المدنيين
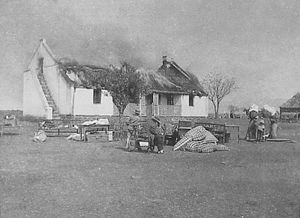
The British also implemented a "scorched earth" policy under which they targeted everything within the controlled areas that could give sustenance to the Boer guerrillas with a view to making it harder for the Boers to survive. As British troops swept the countryside, they systematically destroyed crops, burned homesteads and farms and interned Boer and African men, women, children and workers in concentration camps. Finally, the British also established their own mounted raiding columns in support of the sweeper columns. These were used to rapidly follow and relentlessly harass the Boers with a view to delaying them and cutting off escape, while the sweeper units caught up. Many of the 90 or so mobile columns formed by the British to participate in such drives were a mixture of British and colonial troops, but they also had a large minority of armed Africans. The total number of armed Africans serving with these columns has been estimated at 20,000.
The British Army also made use of Boer auxiliaries who had been persuaded to change sides and enlist as "National Scouts". Serving under the command of General Andries Cronjé (1849 – 1923), the National Scouts were despised as joiners but came to number a fifth of the fighting Afrikaners by the end of the War.[34]
The British utilised armoured trains throughout the war to deliver rapid reaction forces much more quickly to incidents (such as Boer attacks on blockhouses and columns) or to drop them off ahead of retreating Boer columns.
لجان السلام
Among those Burghers who had stopped fighting, it was decided to form peace committees to persuade those who were still fighting to desist. In December 1900, Lord Kitchener gave permission that a central Burgher Peace Committee be inaugurated in Pretoria. By the end of 1900 some thirty envoys were sent out to the various districts to form local peace committees to persuade burghers to give up the fight. Previous leaders of the Boers, like Generals Piet de Wet and Andries Cronjé were involved in the organisation. Meyer de Kock was the only emissary of a peace committee to be convicted of high treason and executed by firing squad.[35]
Joiners
Some burghers joined the British in their fight against the Boers. By the end of hostilities in May 1902, there were no fewer than 5,464 burghers working for the British.[36]
دولة أورانج الحرة
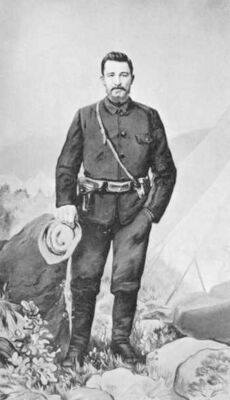
After having conferred with the Transvaal leaders, Christiaan de Wet returned to the Orange Free State, where he inspired a series of successful attacks and raids in the western part of the country, though he suffered a rare defeat at Bothaville in November 1900. Many Boers who had earlier returned to their farms and towns, sometimes after being given formal parole by the British, took up arms again. In late January 1901, De Wet led a renewed invasion of Cape Colony. This was less successful, because there was no general uprising among the Cape Boers, and De Wet's men were hampered by bad weather and relentlessly pursued by British forces. They narrowly escaped across the Orange River.
From then until the final days of the war, De Wet remained comparatively quiet, rarely attacking British army camps and columns partly because the Orange Free State was effectively left desolate by British sweeps. In late 1901, De Wet overran an isolated British detachment at Groenkop, inflicting heavy casualties. This prompted Kitchener to launch the first of the "New Model" drives against him. De Wet escaped the first such drive, but lost 300 of his fighters. This was a severe loss, and a portent of further attrition, although the subsequent attempts to round up De Wet were badly handled, and De Wet's forces avoided capture.
غرب ترانسڤال
The Boer commandos in the Western Transvaal were very active after September 1901. Several battles of importance were fought there between September 1901 and March 1902. At Moedwil on 30 September 1901 and again at Driefontein on 24 October, General Koos De La Rey's forces attacked British camps and outposts, but were forced to withdraw after the British offered strong resistance.
A time of relative quiet descended thereafter on the western Transvaal. February 1902 saw the next major battle in that region. On 25 February, Koos De La Rey attacked a British column under Lieutenant-Colonel S. B. von Donop at Ysterspruit near Wolmaransstad. De La Rey succeeded in capturing many men and a large amount of ammunition. The Boer attacks prompted Lord Methuen, the British second-in-command after Lord Kitchener, to move his column from Vryburg to Klerksdorp to deal with De La Rey. On the morning of 7 March 1902, the Boers attacked the rear guard of Methuen's moving column at Tweebosch. Confusion reigned in British ranks and Methuen was wounded and captured by the Boers.
The Boer victories in the west led to stronger action by the British. In the second half of March 1902, large British reinforcements were sent to the Western Transvaal under the direction of Ian Hamilton. The opportunity the British were waiting for arose on 11 April 1902 at Rooiwal, where a commando led by General Jan Kemp and Commandant Potgieter attacked a superior force under Kekewich. The British soldiers were well positioned on the hillside and inflicted severe casualties on the Boers charging on horseback over a large distance, beating them back. This was the end of the war in the Western Transvaal and also the last major battle of the war.
شرق ترانسڤال
Two Boer forces fought in this area, one under Botha in the south east and a second under Ben Viljoen in the north east around Lydenburg. Botha's forces were particularly active, raiding railways and British supply convoys, and even mounting a renewed invasion of Natal in September 1901. After defeating British mounted infantry in the Battle of Blood River Poort near Dundee, Botha was forced to withdraw by heavy rains that made movement difficult and crippled his horses. Back on the Transvaal territory around his home district of Vryheid, Botha attacked a British raiding column at Bakenlaagte, using an effective mounted charge. One of the most active British units was effectively destroyed in this engagement. This made Botha's forces the target of increasingly large scorched earth drives by British forces, in which the British made particular use of native scouts and informers. Eventually, Botha had to abandon the high veld and retreat to a narrow enclave bordering Swaziland.
To the north, Ben Viljoen grew steadily less active. His forces mounted comparatively few attacks and as a result, the Boer enclave around Lydenburg was largely unmolested. Viljoen was eventually captured.
مستعمرة الكاپ
In parts of Cape Colony, particularly the Cape Midlands District where Boers formed a majority of the white inhabitants, the British had always feared a general uprising against them. In fact, no such uprising ever took place, even in the early days of the war when Boer armies had advanced across the Orange. The cautious conduct of some of the elderly Orange Free State generals had been one factor that discouraged the Cape Boers from siding with the Boer republics. Nevertheless, there was widespread pro-Boer sympathy. Some of the Cape Dutch volunteered to help the British, but a much larger number volunteered to help the other side. The political factor was more important than the military: the Cape Dutch, according to Milner 90 percent of whom favoured the rebels, controlled the provincial legislature, and it's authorities forbade the British Army to burn farms or to force Boer civilians into concentration camps.[37] The British had more limited options to suppress the insurgency in the Cape Colony as result.
After he escaped across the Orange in March 1901, Christiaan de Wet had left forces under Cape rebels Kritzinger and Gideon Scheepers to maintain a guerrilla campaign in the Cape Midlands. The campaign here was one of the least chivalrous of the war, with intimidation by both sides of each other's civilian sympathisers. In one of many skirmishes, Commandant Lotter's small commando was tracked down by a much-superior British column and wiped out at Groenkloof. Several captured Boers, including Lotter and Scheepers, who was captured when he fell ill with appendicitis, were executed by the British for treason or for capital crimes such as the murder of British prisoners or of unarmed civilians. Some of the executions took place in public, to deter further disaffection.
Fresh Boer forces under Jan Christiaan Smuts, joined by the surviving rebels under Kritzinger, made another attack on the Cape in September 1901. They suffered severe hardships and were hard pressed by British columns, but eventually rescued themselves by routing some of their pursuers at the Battle of Elands River and capturing their equipment. From then until the end of the war, Smuts increased his forces from among Cape rebels until they numbered 3,000. However, no general uprising took place, and the situation in the Cape remained stalemated.
In January 1902, Boer leader Manie Maritz was implicated in the Leliefontein massacre in the far Northern Cape.
التبعات والتحليل
اتحاد جنوب أفريقيا
أثر الحرب على السياسة الداخلية البريطانية
ضلوع الامبراطورية
- انظر أيضاً تاريخ الجيش البريطاني
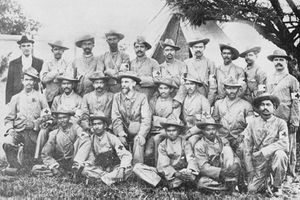
أستراليا
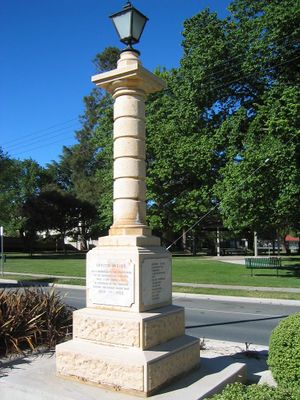
- "انظر أيضاً History of the Australian Army
كندا
- انظر أيضاً Military history of Canada
نيوزيلندا
- See also Military history of New Zealand
جنوب أفريقيا
طالع أيضاً
- تصنيف:أشخاص حرب البوير الثانية
- Bombardment in the Second Boer War
- British Logistics in the Boer War
- تاريخ جنوب أفريقيا
- Military history of South Africa
- Opposition to the Second Boer War
- Volkstaat
- Boer foreign volunteers
- The Absent-Minded Beggar
- London to Ladysmith via Pretoria account of the war by Winston Churchill as a newspaper correspondent accompanying the troops
- Category:Second Boer War Victoria Cross recipients
 Queen's South Africa Medal (1899)
 Queen's Mediterranean Medal (1899) (for South Africa)
 King's South Africa Medal (1902)
 Transport Medal (1903) (for South Africa or China)
المراجع
الهامش
- ^ Jones, Huw M. (October 1999). "Neutrality compromised: Swaziland and the Anglo–Boer War, 1899–1902". Military History Journal. 11 (3/4). Archived from the original on 22 December 2015. Retrieved 19 August 2010.
- ^ Grattan, Robert (2009). "The Entente in World War I: a case study in strategy formulation in an alliance". Journal of Management History. 15 (2): 147–158. doi:10.1108/17511340910943796.
- ^ Haydon, A.P. (1964). "South Australia's first war". Australian Historical Studies. 11 (42).
- ^ أ ب "Role of Black people in the South African War". www.sahistory.org.za. SA History Online. 31 March 2011.
- ^ Scholtz, Leopold (2005). Why the Boers Lost the War. Basingstoke: Palgrave-Macmillan. pp. 2–5, 119. ISBN 978-1-4039-4880-9.
- ^ أ ب "South African War (British-South African history)". Encyclopædia Britannica. Britannica.com. 31 March 2011. Retrieved 23 July 2013.
- ^ "Caring for the soldiers health". Nash's war manual. London: Eveleigh Nash. 1914. p. 309.
- ^ أ ب ت Wessels, André (2011). The Anglo–Boer War 1889–1902: White Man's War, Black Man's War, Traumatic War. African Sun Media. p. 79. ISBN 978-1-920383-27-5.
- ^ "South African concentration camps". nzhistory.govt.nz.
- ^ "Boer War begins in South Africa". History.com (in الإنجليزية). Retrieved 2020-07-23.
- ^ "BBC – History – The Boer Wars". www.bbc.co.uk (in الإنجليزية البريطانية). Retrieved 2021-01-25.
- ^ Millard, Candice (2016). Hero of the Empire: The Boer War, a daring escape, and the making of Winston Churchill. New York: Doubleday. ISBN 978-0-385-53573-1.
- ^ "The South African War 1899–1902". www.sahistory.org.za. South African History Online. Retrieved 2021-01-25.
- ^ أ ب "Lord Roberts is appointed British supreme commander in South Africa". www.sahistory.org.za. South African History Online. Retrieved 2022-01-04.
- ^ Biggins, David (June 2013). "Khaki Election of 1900". angloboerwar.com. Retrieved November 27, 2018.
- ^ van der Waag, Ian (2005). "Boer Generalship and Politics of Command". War in History. 12 (1): 15–43. doi:10.1191/0968344505wh306oa. JSTOR 26061736. S2CID 220749361 – via Jstor.
- ^ "Women & Children in White Concentration Camps during the Anglo–Boer War, 1900–1902". www.sahistory.org.za (in الإنجليزية). South African History Online. 2011-03-21. Retrieved 2019-02-20.
- ^ "The Boer War ends in South Africa". History.com (in الإنجليزية). Retrieved 2021-01-25.
- ^ "Anglo Boer War – Rhodesia Regiment". www.angloboerwar.com. Retrieved 2020-07-15.
- ^ Diver, Luke (2014). "Ireland and the Second Boer" (PDF). Archived (PDF) from the original on 2022-10-09. Retrieved 15 December 2020.
- ^ Riches, Christopher; Palmowski, Jan, eds. (2021). "United Kingdom". A Dictionary of Contemporary World History (6th ed.). Oxford University Press. ISBN 978-0-19-189094-9. Retrieved 2 May 2021.
- ^ Pakenham 1991a, p. 573.
- ^ Paterson, Andrew Barton (2000). Droogleever, R. W. F. (ed.). From the Front: Dispatches from the Boer War (in الإنجليزية). Pan Macmillan. ISBN 978-0-7329-1062-4.
- ^ Wilcox 2002, pp. 84–85.
- ^ Speed, Neil G. (2002). Born to fight : Major Charles Joseph Ross DSO, a definitive study of his life. Melbourne: Caps & Flints Press. ISBN 0-9581356-0-6. OCLC 61567917.
- ^ أ ب "Anglo–Boer War Philatelic Society: Collecting Interests". Archived from the original on 10 December 2005.
- ^ "Saint Helena Island Info: All about St Helena, in the South Atlantic Ocean • Boer Prisoners (1900–1902)". Burgh House Software.
- ^ Harman, Mike (6 March 2017). "POW camps in Ceylon during the Boer war". libcom.org (in الإنجليزية). Archived from the original on 30 June 2019. Retrieved 2020-04-08.
- ^ "Anglo Boere Oorlog/Boer War (1899–1902) Prisoners Of War genealogy project". geni_family_tree (in الإنجليزية الأمريكية). Retrieved 2020-04-08.
- ^ Cameron 1986, p. 207.
- ^ Blake 2010, p. 46.
- ^ A personal copy of Millicent Fawcett's report, together with extensive photographs and inserts is available for consulation at The Women's Library, Old Castle Street, London E1 7NT, archive reference 7MGF/E/1
- ^ أ ب ت Jones 1996
- ^ Pakenham 1991, p. 571.
- ^ Blake 2010, p. 140.
- ^ Ploeger1985, pp. 15–22.
- ^ Marsh 1994.
المصادر الرئيسية
- Arthur Conan Doyle: The Great Boer War. London: Smith, Elder, 1900.
- Sol T. Plaatje: Mafeking diary: a black man's view of a white man's war. Cambridge: Meridor Books; Athens: Ohio University Press, 1990. ISBN 0-85255-064-2 (Meridor) ISBN 0-8214-0944-1 (Ohio UP). Originally published as The Boer War diary of Sol T. Plaatje; an African at Mafeking. Johannesburg: Macmillan, 1973 ISBN 0-86954-002-5.
- Alfred Milner: "The Milner Papers", vol. II South Africa 1899 – 1905, edited by Cecil Headlam, London: Cassell, 1933.
- J.H.M. Abbott, Tommy Cornstalk, Longmans London, 1902, (an autobiography of Abbott's service in the War).
- Droogleever, R.W.F. (ed.), From the Front: A. B. (Banjo) Patterson's Dispatches from the Boer War, MacMillan, Sydney, 2000. (A completed compilation of the reporter 'Banjo Patterson's (1864-1941) dispatches (75 letters and articles sent to Australia during the period November 1899 to July 1900. Patterson was present at numerous engagements including Paardeberg, Bloemfontein, Pretoria and finally the surrender of General Martinus Prinsloo at the Brandwater Basin. These writings give a military and literary insight into events, with comments on the medical crisis in Bloemfontein following its occupation and outbreak of enteric fever) ISBN 07329 1062 5
- Lieut. George Witton, Scapegoats of the Empire, Melbourne, 1907; republished as George R. Witton, Scapegoats of the Empire, Angus & Robertson Melbourne, 1982., (Witton's autobiography of his trial and conviction along with "Breaker Morant"). ISBN 0 207 146667
- Field, Kingslet (edt). Book "Soldier Boy" A young New Zealander writes home from the Boer War, compiled by Kingsley Field. Letters written by Harry Gilbert to his family in New Zealand from April 1901. First published in 2007 by New Holland Publishers (NZ) Ltd. ISBN 978 186966 177 9.
- Lt. Col. P.L. Murray, (ed.) Official Records of the Australian Military Contingents to the War in South Africa, Government Printer, Melbourne, 1911. (Rare, but this book lists all Colonial Forces, plus Commonwealth troops' names, number rank, including nurses rates of pay and promotions. Citations on each serviceman's /servicewoman's injuries, illnesses, wounds, killed in action etc. Details the ships on which contingents sailed and returned, the number of horses per contingent despatched to the war, unit establishments, active services and honours, unit patrols and engagements etc. Book comprises 607 pages)
- New South Wales Imperial Bushmen Contingent War Diary and letters written by the Adjutant, Major David Miller. They tell the day by day story of the deployment in 1900 of this unique unit raised by private subscription in New South Wales.
المصادر الثانوية البحثية
- Byron Farwell: The Great Anglo-Boer War. New York: Harper and Row, 1976. ISBN 0-06-011204-2 (published in the UK as The Great Boer War. London: Allen Lane, 1977. ISBN 0-7139-0820-3).
- April A. Gordon and Donald L. Gordon (eds.): Understanding contemporary Africa. 3rd ed. Boulder, Colorado: Lynne Rienner, 2001. ISBN 1-55587-850-4.
- David Harrison: The white tribe of Africa: South Africa in perspective. Los Angeles: University of California Press, 1981. ISBN 0-520-04690-0.
- Denis Judd and Keith Surridge. The Boer War. London: John Murray, 2003. ISBN 0-7195-6169-8.
- W. Baring Pemberton. Battles of the Boer War. First published 1964 by B.T. Batsford - republished by Pan, 1969.
- Thomas Pakenham: The Boer War. New York: Random House, 1979; ISBN 0-394-42742-4.
- Fransjohan Pretorius : Scorched Earth. Cape Town: Human & Rousseau, 2001; ISBN 0-7981-4192-1.
- Kit Denton, Australian at War: For Queen and Commonwealth, Time-Life Books, Australia, 1987, (pp. 76-163) ISBN 0949118 08 7 (many photos and maps)
- Laurie Field, The Forgotten War, Melbourne University Press, 1979.
- R.L. Wallace, Australians at the Boer War, AGPS, Canberra, 1976. ISBN 0 642 999391 2 (an important work in re-awaking Australian interest in the Boer War - but hard to locate)
- William (Bill) Woolmore, The Bushveldt Carbineers and the Pietersburg Light Horse, Slouch Hat Publications, Rosebud, 2002. ISBN 0 9579752 0 1 (solid work on the men who served in the ill-fated unit)
- Neil G. Speed, Born to Fight, Caps & Flints Press, Melbourne, 2002. (an Australian Maj. Charles Ross DSO who served with Canadian Scouts) ISBN 0 9581356 0 6
- Craig Wilcox, Australia's Boer War, Oxford University Press, 2002. (important academic work) ISBN 0 19 551637 0
- William (Bill) Woolmore,Steinaecker's Horsemen: South Africa 1899-1903, South African Country Life,Barberton, 2006. ISBN 0 9584782 4 4 (solid research by an Australian writer into the men who served in this unit)
- Max Chamberlain & Robert Droogleever, The War with Johnny Boer: Australians in the Boer War 1899-1902, Ligare, Riverwood, 2003. (sound research with maps, drawing and pictures of Australian participants)
- Dave C. George, Carvings from the Veldt: Rifle carvings from Anglo-Boer War, 1899-1902, Northern Rivers N.S.W., 2004. (photographic and historical record of surviving Boer War rifles (in Australia, New Zealand, Canada, UK and USA) and the variety of stock carvings) ISBN 0 646 44043 8
وصلات خارجية
- The Second Boer War. Its Effects on Military and Diplomacy
- The Register of the Anglo-Boer War; casualties and participants
- Chronology South Africa Boer War
- The Australian War Memorial (hundreds of photos in the Boer War section)
- Canada & The South African War, 1899-1902 - Canadian War Museum
- Chronology Great Britain Boer War
- Colonial Units
- The New Zealand Contingents
- Field Gun photos and video
- British casualties - Officers: A to Z
- War Museum of the Boer Republics. Anglo Boer War Museum (accessed 24 December 2003)
- National UK Archives site
- Online Catalogue entry for The Women's Library: Millicent Fawcett's personal copy of the Fawcett Commission Report, search for RefNo=7mgf/e/1
- Royal Engineers Museum Royal Engineers in the Anglo-Boer war (Ballooning, Blockhouses, Bridging, Railways, Searchlights, Signals, Steam Transport and Telegraph)
- A Handbook of the Boer War by Gale and Polden, Limited, from Project Gutenberg
- The Record of a Regiment of the Line, by M. Jacson, from Project Gutenberg
- Commando: A Boer Journal of the Boer War (now in the public domain and readable online), by Deneys Reitz, a participant and later deputy prime minister of South Africa
- The Boer War from a Boer Perspective
- British Soldiers who served, were wounded or died
- Soldiers of the Queen - Heritage Resources Saint John
- Australian Light Horse Studies Centre Resources relating to the Australian participation in the Boer War by their mounted troops.
خطأ استشهاد: وسوم <ref> موجودة لمجموعة اسمها "lower-alpha"، ولكن لم يتم العثور على وسم <references group="lower-alpha"/>
- CS1 الإنجليزية البريطانية-language sources (en-gb)
- CS1 الإنجليزية الأمريكية-language sources (en-us)
- Short description is different from Wikidata
- Articles with hatnote templates targeting a nonexistent page
- Articles with unsourced statements from October 2019
- نزاعات القرن 19
- نزاعات القرن 20
- حروب عصابات
- Wars involving the states and peoples of Africa
- حرب البوير الثانية
- Military history of Australia during the Second Boer War
- حروب أستراليا
- حروب الإمبراطورية البريطانية
- تاريخ جنوب أفريقيا
- بوير
- تاريخ هولندا
